
Auto Transient Detection
1. Overview
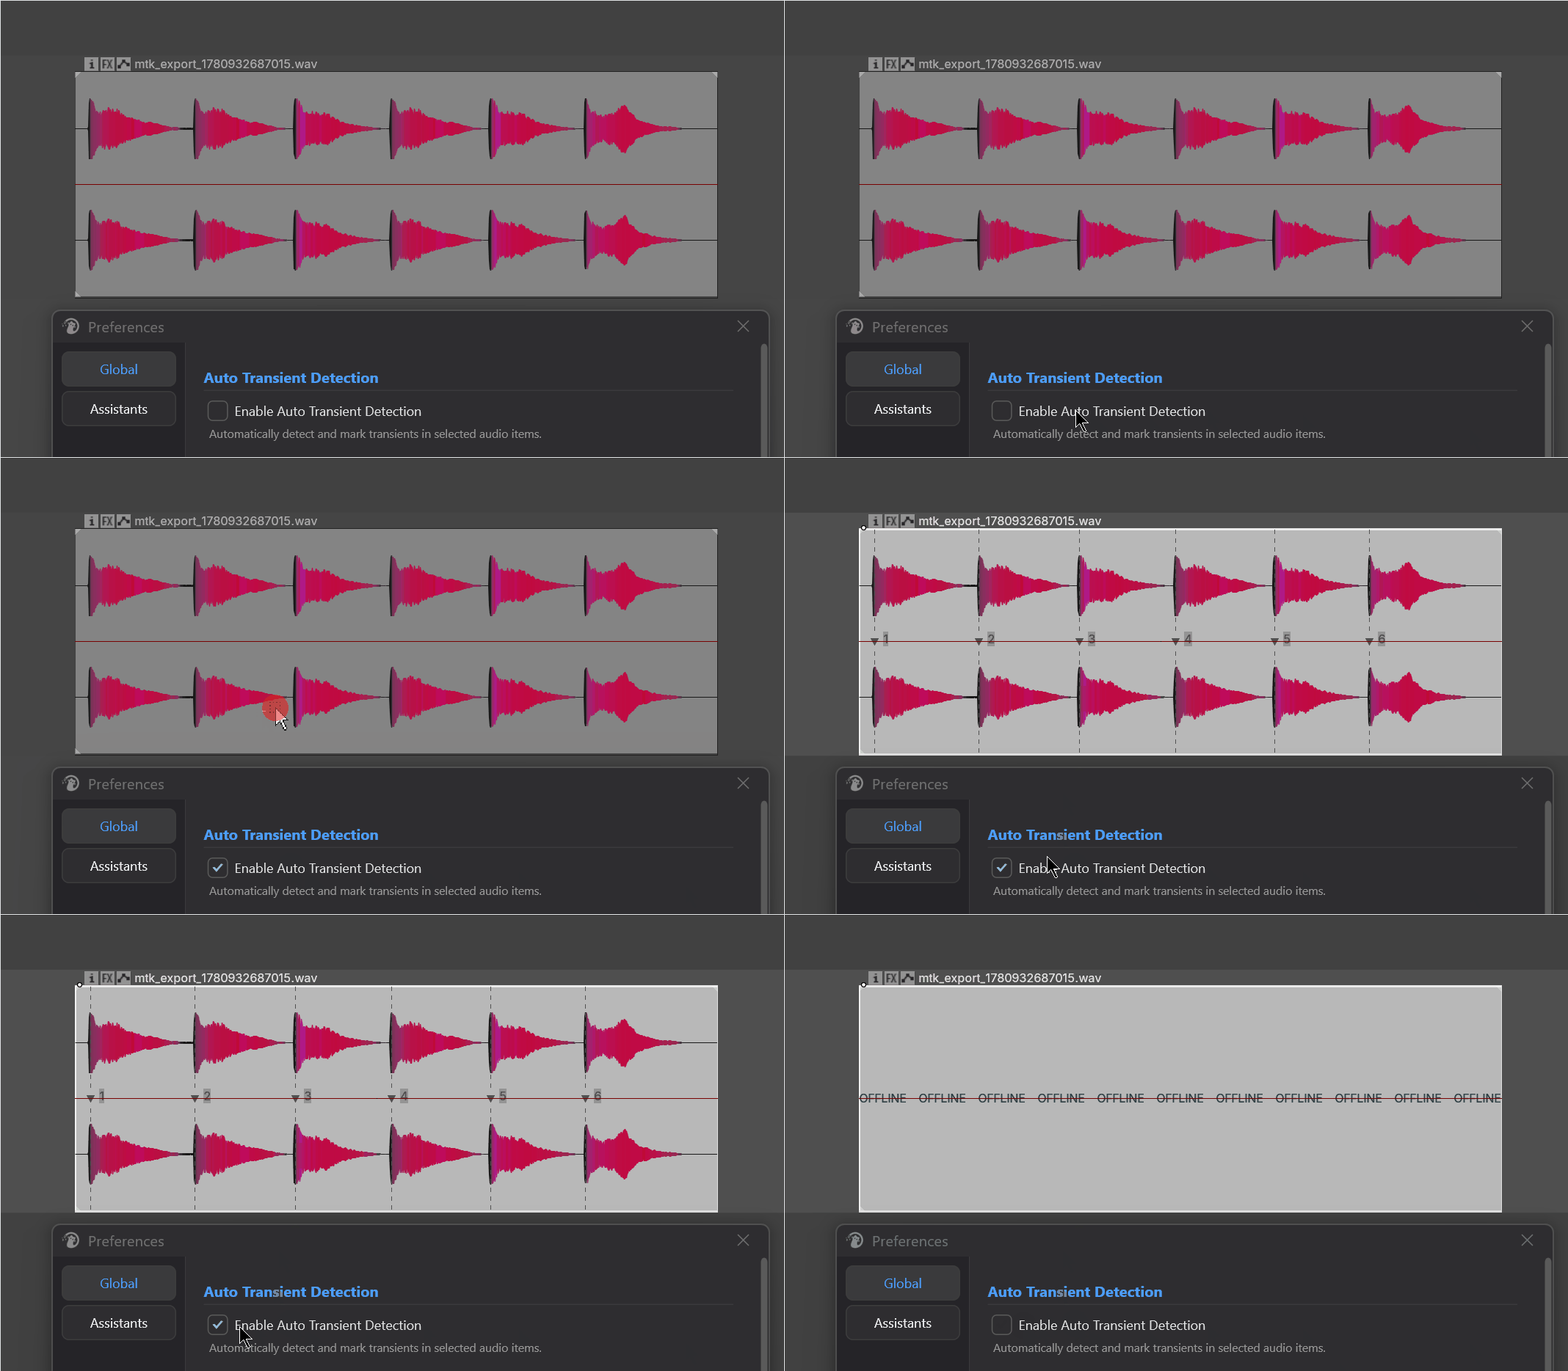
Auto Transient Detection is a transient marker tool in Mantrika Tools for media items. Its purpose is simple: select an item → numbered transients appear on the take.
It finds the transient points inside each item and marks them directly on the active take as numbered take markers (1, 2, 3, …), shown in light gray at the start of each transient.
There are two ways to use it:
- Automatic mode: After the service is enabled, any selected audio item is analyzed in the background in batches, with no manual trigger needed.
- Manual mode: Select items → trigger the action → mark the selected items once.
These markers are purely visual aids — they let you see at a glance where each item's transients are in the Arrange view. They do not affect audio playback or export, and they do not share data with other features.
Note: If you delete or move a marker, the service will re-detect and re-mark the whole set (see §5). If you want to keep your own edits, toggle skip first.
2. Opening the tool
2.1 Enable / disable the automatic detection service
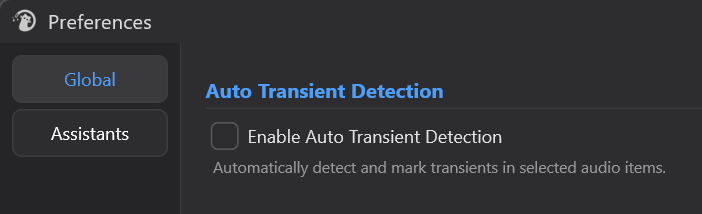
Check the box to start the service. The switch state is persisted and will be restored the next time REAPER starts.
2.2 Manual actions (search "mantrika Transient" in the Action List)
You can also access it from the menu:
Extensions → Mantrika Tools → Util item
 + Detect transients for selected items (manual)
+ Toggle: skip auto transient for selected items| Action name | Function |
|---|---|
mantrika : Analysis - Detect Transients for Selected Items (manual) | Mark the selected items once; does not depend on the automatic service switch. |
mantrika : Analysis - Toggle Skip Auto Transient Detection for Selected Items | Toggle the "skip automatic detection" flag for the selected items. |
3. Basic usage — three typical operations
3.1 Turn on the background service and let it run
1. Open Preferences...
2. Check "Enable Auto Transient Detection"
3. Select audio items in the Arrange view (one at a time or many)
4. Numbered take markers appear on each itemCharacteristics:
- It starts calculating as soon as items are selected; no extra trigger needed.
- Rate-limited per tick (≤ 10 items / ≤ 10 ms) so it does not slow REAPER down.
- Items that have already been analyzed are not re-analyzed unless their source changes.
- Turning the service off clears all transient markers from takes in the current project.
Good for everyday SFX editing — markers appear quietly in the background.
3.2 One-shot manual detection
1. Select the items you want to mark (multiple allowed)
2. Trigger "Analysis - Detect Transients for Selected Items (manual)"
3. Done
When to use manual mode?
- The automatic service is off, and you want to mark a few items on demand.
- Source audio is longer than 5 minutes — the automatic service skips such files to avoid blocking, but the manual action has no length limit.
Manual mode forces detection on all eligible items, ignoring mute state and skip flags. MIDI takes, subproject items, empty takes, and other content without real audio sources are still skipped.
3.3 Prevent an item from being automatically marked
Some material simply does not need transient markers (for example, long ambience or sounds you do not intend to slice).
1. Select those items
2. Trigger "Analysis - Toggle Skip Auto Transient Detection..."
3. Markers are cleared, and the item will no longer be auto-detected
To restore it:
1. Select the items again
2. Trigger the same toggle action again
3. The skip flag is cleared, and the automatic service will re-mark it next time it processes the item
Toggle logic:
- Has markers → clears markers and adds a "skip" flag.
- No markers but has a "skip" flag → clears the flag (re-enables automatic detection).
- Neither → does nothing.
In short, it is an "I do not want this" / "I want it again" switch.
4. What the markers look like
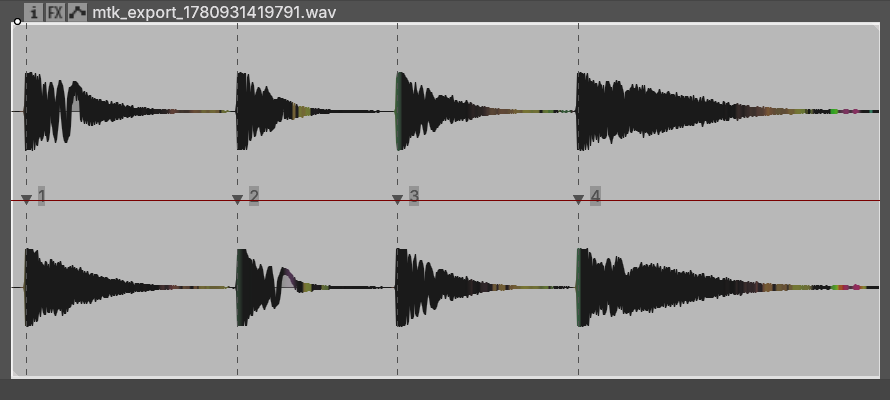
| Property | Description |
|---|---|
| Name | Pure numeric sequence 1, 2, 3, … (in time order) |
| Color | Light gray |
| Position | Exact transient start point inside the take (millisecond precision) |
| Type | Take marker (not a project marker; it moves with the item) |
Do not manually rename these markers — once a name is changed to something non-numeric, the system will no longer treat it as a transient marker, and both self-healing and cleanup logic will ignore it.
These markers travel with the take. Copying or splitting an item also copies the markers.
5. Self-healing behavior: what happens if you delete or move a marker
The automatic service checks the marker state of each item:
| What you did | How the automatic service responds |
|---|---|
| Manually deleted one transient marker | Detects the state change → re-marks the whole set |
| Manually moved one transient marker | Same as above → re-marks the whole set |
| Source audio changed (trimmed start/end, swapped source, reversed) | Re-marks the whole set |
| Nothing changed | Skips; does not re-analyze |
The design intent is to keep markers always reflecting the current source. If you want to fine-tune them yourself, toggle skip first.
6. Which items are skipped
The following are always skipped, in both automatic and manual modes:
| Type | Reason |
|---|---|
| MIDI take | Not audio |
| Subproject item | Kept distinct |
| Click source / timecode source | Not real audio |
| Mirror segment | Not audio |
| Empty take / no active take | Nothing to analyze |
| Item flagged as skip | User opted out |
Additional skips that apply only in automatic mode:
| Type | Reason |
|---|---|
| Muted item | Usually not needed |
| Source longer than 5 minutes | Full scans on long sources affect responsiveness, and most common material is shorter. Use the manual action when needed |
8. Troubleshooting
| Symptom | Cause | Fix |
|---|---|---|
| Selected an item but no markers appear | Automatic service is off, or source is longer than 5 minutes | Enable it in Preferences; use the manual action for long sources |
| Service is on but still no markers | Item is flagged skip / MIDI / subproject / muted | See §6; if it has a skip flag, toggle once to clear it |
| Markers keep coming back | Self-healing: deleting or moving markers triggers re-detection | To keep your own edits, toggle skip before editing |
| Markers disappeared after turning the service off | By design — turning the service off clears all transient markers | Re-enable it and select all items, or select all items and run the manual action |
| Large imported item shows no markers after selection | REAPER is still generating the waveform preview; detection runs after the preview is ready | Wait a few seconds until the waveform is fully drawn, then select again |
| Want to clear everything | Turn off "Enable Auto Transient Detection" | Turning the service off clears transient markers on all items |
⚠️ Warning! If your current project contains very long source takes (for example, foley editing or recording sessions), it is recommended to turn this automatic service off to avoid unnecessary performance overhead.
9. Typical workflows
Workflow A: everyday SFX editing
1. One-time setup: enable it in Preferences
2. Work normally; markers appear automatically when you select items
3. Toggle skip on items that do not need markers
4. Use the markers to align items visually or slice more precisely
Workflow B: temporarily mark a few items
1. Keep the automatic service off
2. Select the items you need
3. Trigger "Analysis - Detect Transients..."
4. Done
Workflow C: long sources (> 5 minutes)
1. Select the long source item
2. Trigger the manual action (the automatic service skips this length)