
Loudness Analyze
1. Overview
Loudness is a loudness tool for media items. Its purpose is select items → one action → done.
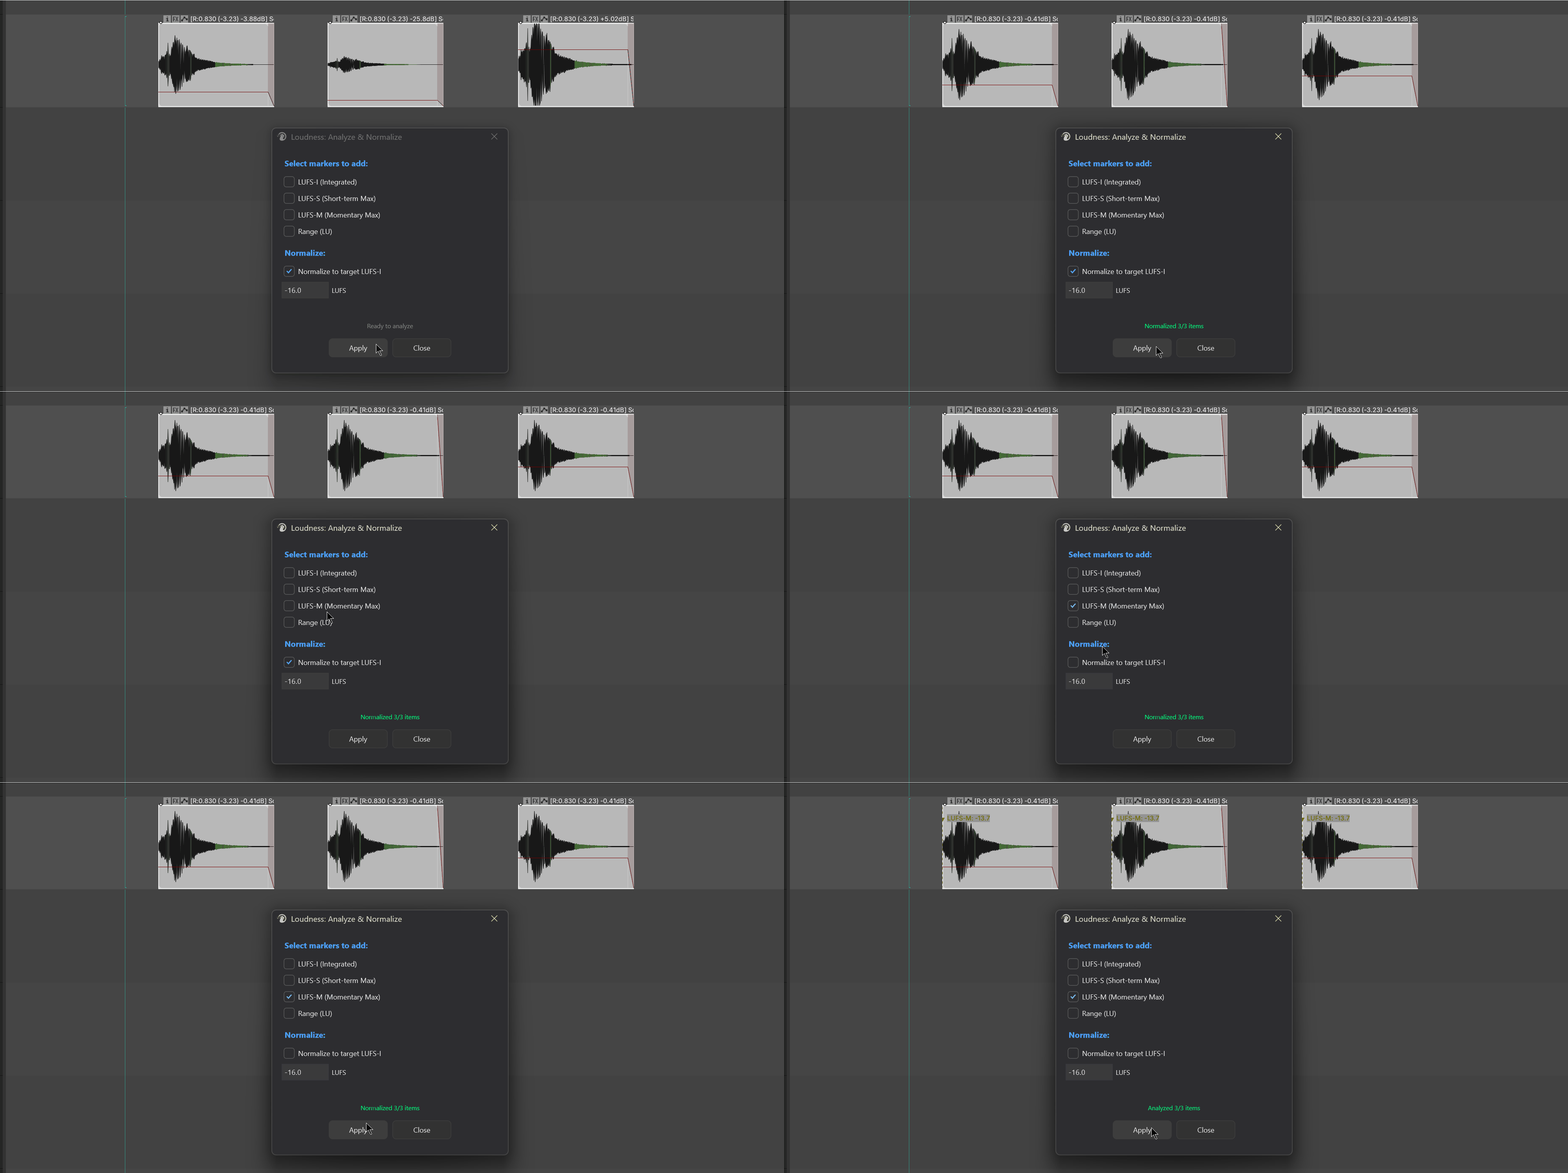
It does two things:
- Analyze loudness: calculates LUFS-I / LUFS-S Max / LUFS-M Max / Range for an item and writes them as take markers directly on the item.
- Normalize loudness: adjusts the item's volume to a target LUFS-I value. It changes item volume (
D_VOL), does not render, and does not alter the waveform.
The whole workflow revolves around item selection — select items, trigger the action, and the rest is handled automatically.
2. Opening the tool
Menu paths:
Extensions → Mantrika Tools → Loudness → Analyze & normalize (main UI entry)

Extensions → Mantrika Tools → Loudness → Normalize selected to -23 LUFS -I

Extensions → Mantrika Tools → Loudness → Normalize selected to median LUFS-I| Action name (search "Loudness" in the Action List) | Function |
|---|---|
mantrika : Loudness - Analyze and Add Markers / Normalize to Target LUFS | Opens the main window; freely choose marker combination and target value |
mantrika : Loudness - Normalize Selected Items to -23 LUFS | One-click normalize selected items to -23 LUFS (broadcast standard) |
mantrika : Loudness - Normalize Selected Items to Median LUFS | One-click normalize selected items to the median loudness (unify volume across multiple assets) |
The last two are shortcut channels to save clicks; internally they use the same analysis logic.
3. Main window overview
Trigger Loudness - Analyze and Add Markers / Normalize to Target LUFS to open the main window:
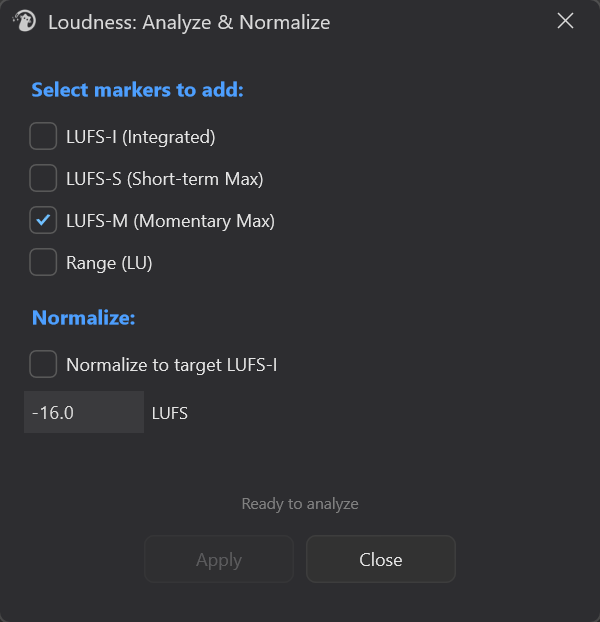
┌──────────────────────────────────────────────┐
│ Select markers to add:                       │  ← Section 1: analyze
│   ☐ LUFS-I (Integrated)                      │
│   ☐ LUFS-S (Short-term Max)                  │
│   ☐ LUFS-M (Momentary Max)                   │
│   ☐ Range (LU)                               │
│                                              │
│ Normalize:                                   │  ← Section 2: normalize
│   ☐ Normalize to target LUFS-I               │
│   [ -16.0 ]  LUFS                            │
│                                              │
│ ▭▭▭▭▭▭▭▭▭▭▭▭▭▭▭▭▭▭▭▭▭▭▭▭▭ │  ← Progress bar
│              Ready to analyze                │  ← Status text
│                                              │
│          [  Apply  ]    [  Close  ]          │
└──────────────────────────────────────────────┘| Area | Description |
|---|---|
| Markers section | Check which markers to write on the item; any combination allowed |
| Normalize section | Must be checked before the target can be edited; target range -60.0 ~ 0.0 LUFS |
| Progress bar / status | Shows progress and count during analysis; turns green on success or red on failure |
| Apply | Runs the analysis; while running the button becomes Cancel and can be used to abort |
Important: Markers and Normalize are mutually exclusive. Checking any marker automatically unchecks normalize, and vice versa. If you want to "add markers first, look, then normalize," run it twice.
4. Basic usage — three typical operations
4.1 Add loudness markers to items
1. Select one or more items in the Arrange view
2. Trigger "Loudness - Analyze and Add Markers / Normalize..."
3. Check the markers you want (for example, only LUFS-I)
4. Click ApplyResult: the active take of each selected item gets the corresponding take marker, looking like:
LUFS-I: -18.3Orange, positioned at the take start (corrected for snap offset and start offset).
Re-running deletes old loudness markers first, then writes new ones — they do not pile up.
4.2 Normalize items to a target LUFS
1. Select the items you want to normalize
2. Trigger the main-window action
3. Check "Normalize to target LUFS-I"
4. Enter a target in the input box, for example -16.0
5. Click ApplyResult: each item's volume is adjusted so its LUFS-I lands on the target.
Normalize changes item volume; the original audio file is untouched. To undo, press Ctrl+Z or manually drag the item volume back to 0 dB.
4.3 One-click operations (no window needed)
| Scenario | Which action to use |
|---|---|
| Normalize a batch of assets to the broadcast standard -23 LUFS | Loudness - Normalize Selected Items to -23 LUFS |
| A group of assets has uneven volume and you want to level them | Loudness - Normalize Selected Items to Median LUFS |
Both actions briefly flash the main window to show progress, then close automatically when finished.
Median mode requires at least 2 audio items to be meaningful; fewer than 2 shows a message and refuses to run.
5. What the four marker options mean
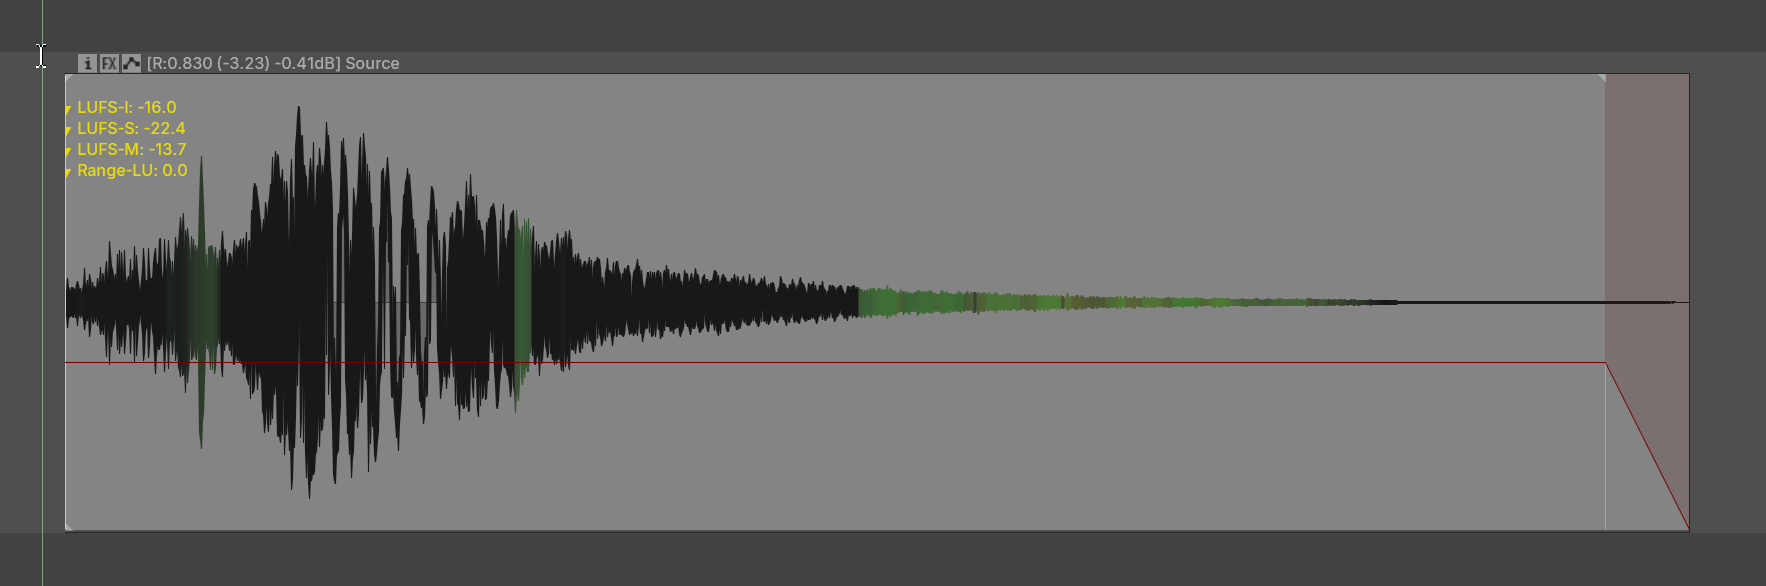
| Option | Marker text written | Plain meaning |
|---|---|---|
| LUFS-I (Integrated) | LUFS-I: -18.3 | The average loudness of the whole item (most commonly used) |
| LUFS-S (Short-term Max) | LUFS-S: -12.1 | The loudest 3-second sliding window |
| LUFS-M (Momentary Max) | LUFS-M: -8.5 | The loudest 400 ms short window |
| Range (LU) | Range-LU: 7.2 | Overall loudness range span |
For everyday use one or two markers are enough; checking all four crowds the top of the take with markers.
6. Status feedback
The status bar at the bottom of the main window reports the result:
| Display text | Meaning |
|---|---|
Ready to analyze | Idle |
Preparing... / Processing N/M items... | Running (multi-threaded) |
Analyzed K/N items | Only markers were added; K succeeded |
Normalized K/N items | Only normalize was run; K succeeded |
Analyzed & Normalized K/N items | Two-step merge triggered by the shortcut actions |
No audio items selected | No valid audio items in the selection |
Analysis cancelled | You clicked Cancel |
MIDI items / empty items / video items are silently skipped and are not counted in the success total.
7. Preference persistence
Choices in the main window are automatically saved after each successful run and restored the next time the window opens:
| Setting | Persisted? |
|---|---|
| The four marker checkboxes | ✅ |
| Normalize switch | ✅ |
| Target LUFS value | ✅ |
| Last status text | ❌ (each reopen shows "Ready to analyze") |
Only a successful Apply saves the settings — opening the window and closing it without running does not change the saved preferences.
8. Keyboard / mouse cheat sheet
| Input | Behavior |
|---|---|
| Trigger main-window action | Opens the window |
| Enter | Same as clicking Apply |
| Apply button (during analysis) | Becomes Cancel; click to abort |
| Target LUFS input box | Accepts only numbers, ., and -; values outside -60 ~ 0 are clamped automatically |
| Close window (X / Close) | Automatically cancels any running analysis |
9. Typical workflows
Workflow A: one-click normalize game SFX assets to -23 LUFS before delivery
1. Select all items to deliver
2. Trigger "Loudness - Normalize Selected Items to -23 LUFS"
3. Wait a few seconds until "Normalized N/N items" appears
Workflow B: level out a group of footsteps or weapon sounds
1. Select the group of items
2. Trigger "Loudness - Normalize Selected Items to Median LUFS"
3. All items are pulled to the group's median loudness
Good for "first get the group to a similar perceived level, then push the whole group with a fader."
Workflow C: review how loud each item is
1. Select items
2. Trigger the main-window action
3. Check only LUFS-I (enough for everyday use)
4. Apply
5. Read the marker numbers at the top of each item in the Arrange view
Adding markers does not prevent later normalization — running normalize afterwards deletes the old markers cleanly.
10. Troubleshooting
| Symptom | Cause | Fix |
|---|---|---|
| Apply button is grayed out | No item selected / neither markers nor normalize checked | Select an item and check at least one option |
Status shows No audio items selected | Selected items are MIDI / video / empty takes | Try again with audio items |
| No marker appears on the item | Normalize was selected instead of markers; they are mutually exclusive | Check the marker options and Apply again |
| Median mode refuses to run | Fewer than 2 audio items in the selection | Select at least 2 audio items |
| Volume did not change after normalize | The item is already near the target, or LUFS-I is too low (~-70) to measure | Check whether the source is extremely quiet or nearly silent |
| Markers pile up on the item | (Should not happen) the plug-in deletes old markers with the same name first | — |
| Want to undo normalize | Press Ctrl+Z once, or manually reset item volume | — |
11. Relationship with other modules
| Related module | Description |
|---|---|
Loudness Meter (Loudness - Lightweight Meter) | A real-time level meter that looks at the master / current playback stream. This module measures existing items; the purposes are different. |