
Qi
Qi is a media variant generator — select several items in the project, press Generate, and it creates N stylistically different copies along the timeline according to the random/sequential rules you set: each copy has different volume, pitch, pan, reverse state, start offset, and even the parameters of any FX you have captured.
Typical use cases:
- A footstep, sword clash, or explosion clip that you want 20 non-repeating variants laid out on the timeline
- A continuous clip that you want to transition gradually from -3 semitones to +3 semitones
- A set of Foley clips where you want each variant to randomly play a short segment rather than the whole clip
- Wanting to audition variations several times before deciding whether to keep them — Qi provides a full playable blue preview before you press Generate
- A "recipe" you use often — save it as a preset and recall it with one click next time
The core workflow of the whole window: select items → adjust parameters → audition preview → Generate to commit.
2. Opening Qi
Menu entry:
Extensions → Mantrika Tools → QiOr search in the Action List:

| Action name | Purpose |
|---|---|
mantrika : Misc - Qi | Open / close the Qi window |
mantrika : Qi: Apply Preset 1 ~ 5 | Apply presets 1~5 to selected items without opening the window |
Tip: The five Preset Actions can be bound to shortcuts — select items → press shortcut → results appear instantly, no window needed.
3. Interface Overview
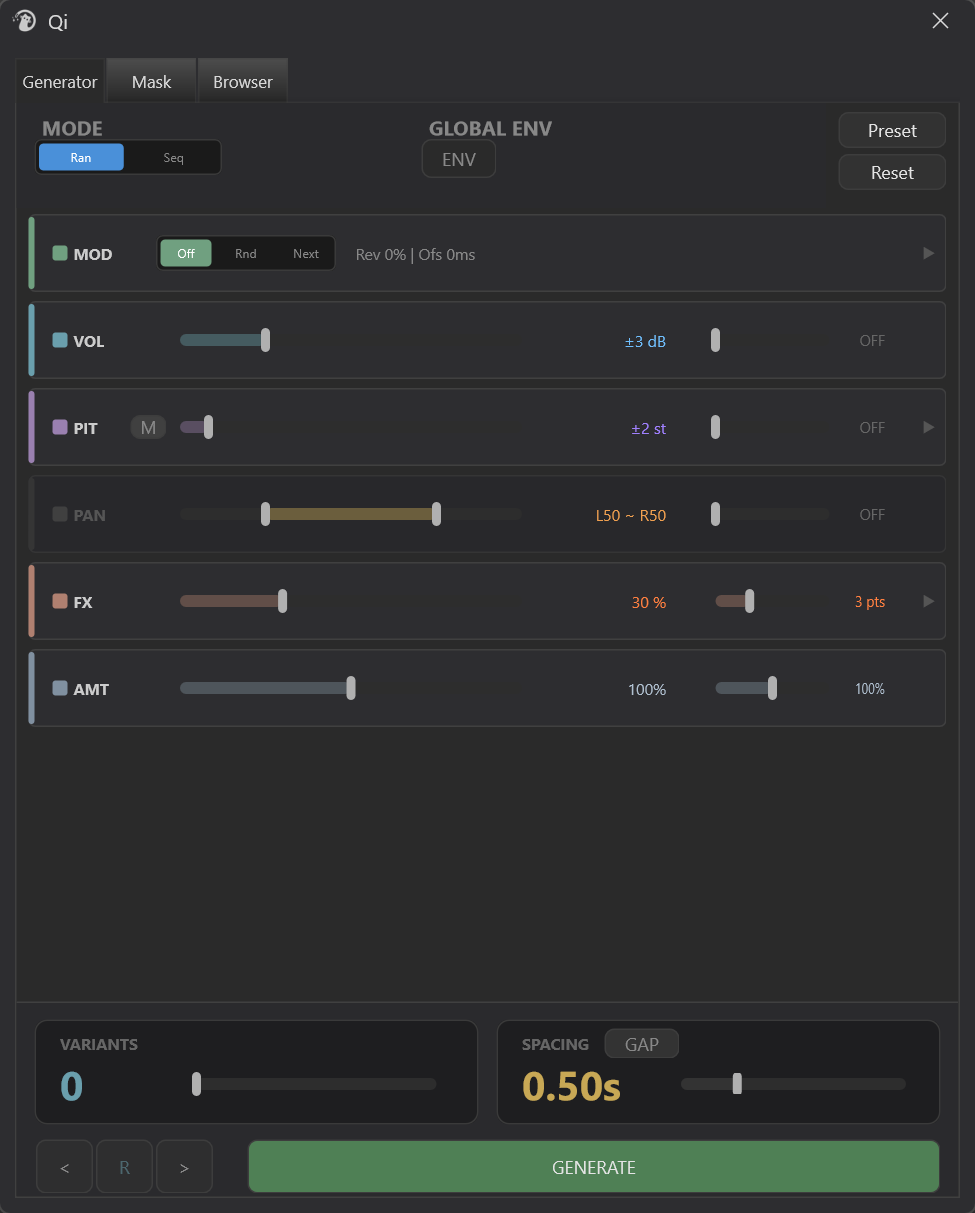
The Generator Tab consists of four areas:
| Area | Content |
|---|---|
| Logic Bar (top) | Random / sequential mode, global ENV switch, Preset and Reset buttons |
| Strips (middle) | Six horizontal strips: MOD / VOL / PIT / PAN / FX / AMT, each controlling one parameter category |
| Footer (bottom) | VARIANTS (how many variants), SPACING (variant spacing), audition and Generate buttons |
| Tab row | Generator (main panel) / Mask (per-item parameter masking) / Browser (media library browser and drag-drop) |
4. Selecting Items and Previewing
4.1 Selecting Items
Select one or more items on the REAPER timeline, then switch to the Qi window — Qi treats these items as source material, and all variants are generated based on them.
Tip: When multiple items are selected, Qi treats them as a group for copying: each variant contains all items in the entire group, preserving the relative positions and lengths of items inside the group.
⚠️ Source lock — once the blue preview appears, the source item set is locked: changing the selection in REAPER will not update the source material. To switch source material, press Reset (or Generate to commit) to end the current round and reselect.
4.2 Blue Preview
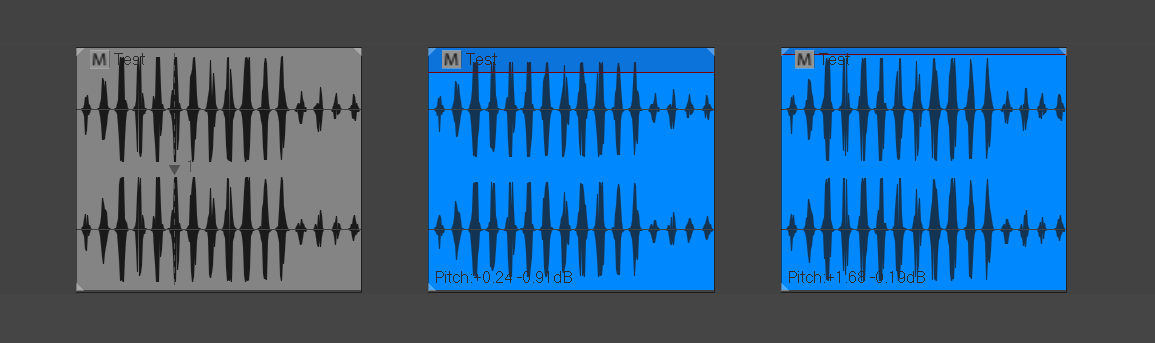
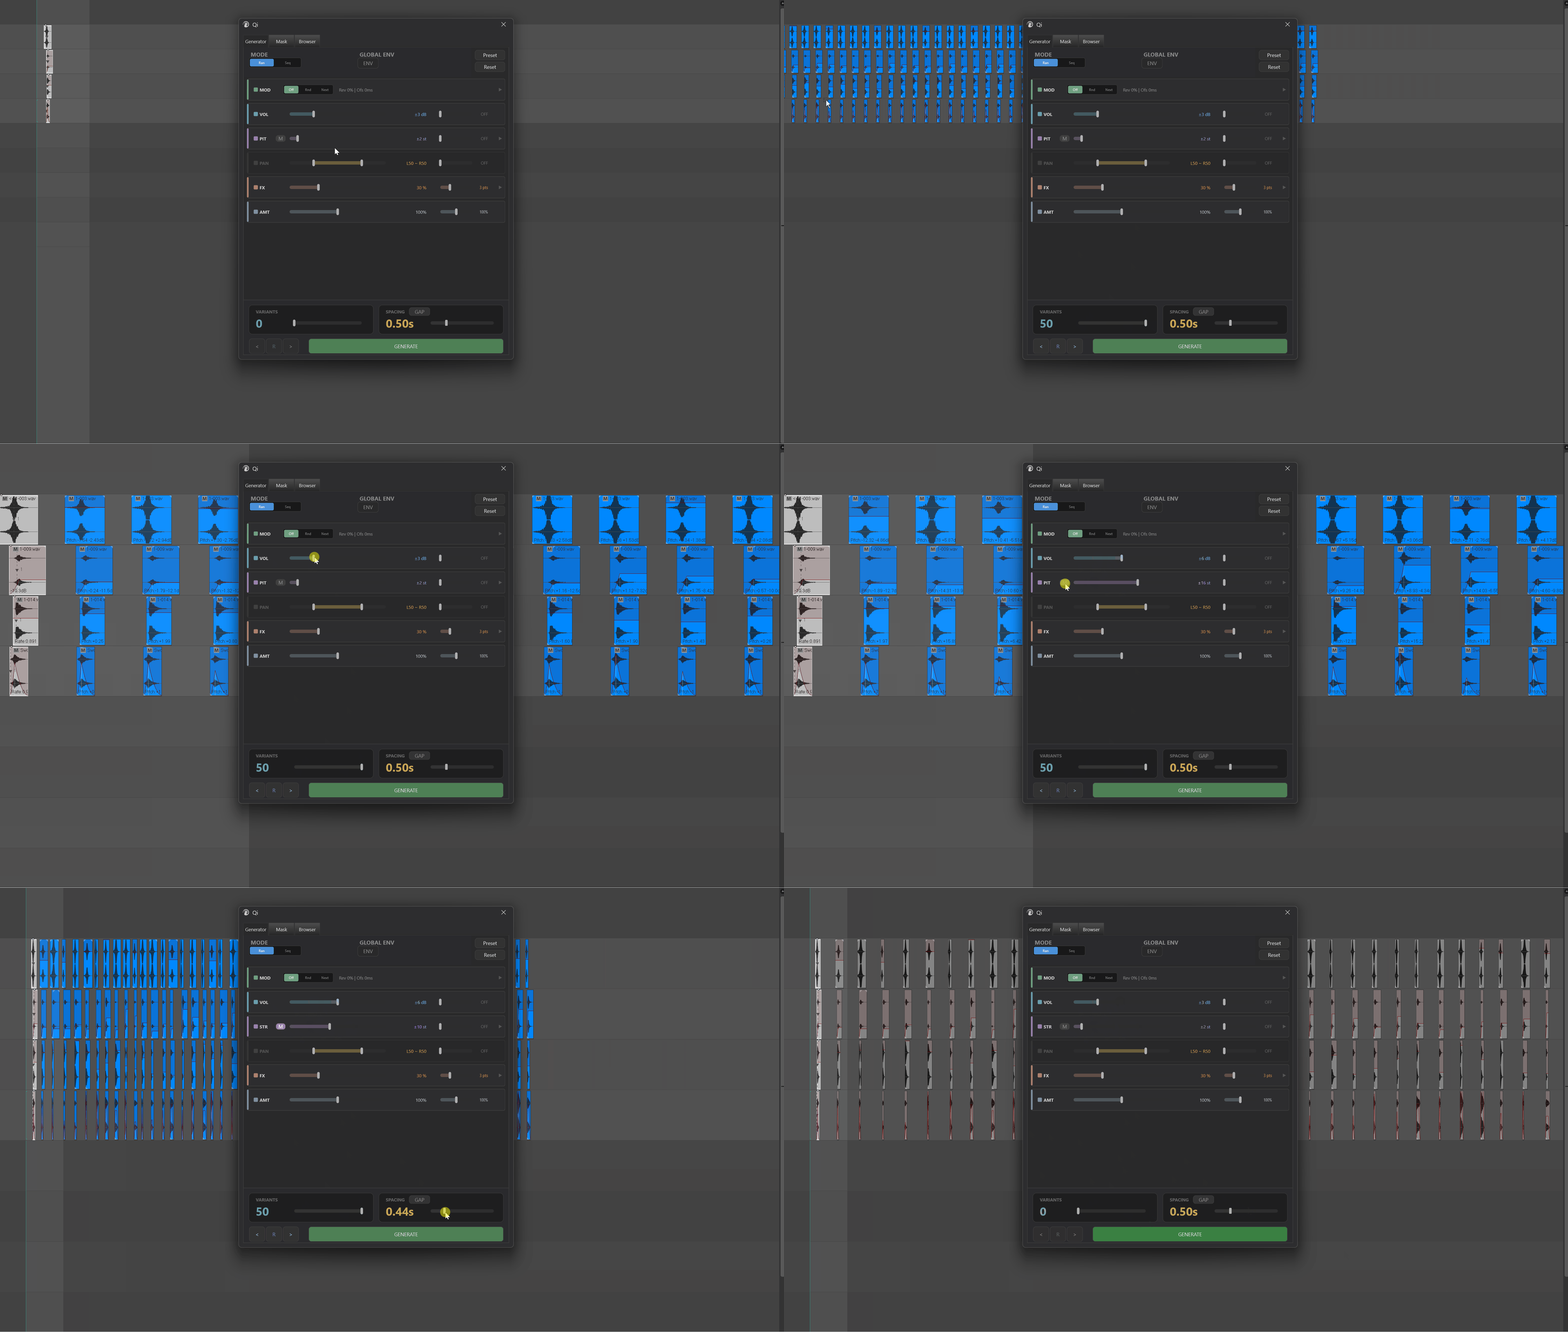
As long as VARIANTS > 0 (default is 0, drag the VARIANTS slider first), Qi will automatically generate a set of blue items on the timeline after you move any parameter slider — this is a preview, not yet committed. Blue means "temporary" and can be changed freely.
- After changing parameters: blue items automatically recalculate
- Satisfied: press GENERATE, blue items become normal colored, permanent items
- Do not want them: press the Reset button (top-right corner), all blue items disappear, parameters return to defaults, or drag VARIANTS to 0
⚠️ Undo (Ctrl+Z) and Qi preview — Qi automatically cleans up preview records in the undo history, so old blue items do not pollute the project.
4.3 Three Audition Buttons

The < R > buttons on the left side of the Footer switch which variant is played:
| Button | Behavior |
|---|---|
< | Switch to the previous variant and play |
R | Jump to a random variant and play |
> | Switch to the next variant and play |
Each switch moves the edit cursor to the start of that variant and plays from the beginning (via REAPER transport, without Solo — solo the track yourself if you want to hear it in isolation).
Tip: The Spacebar inside the Qi window is for auditioning files in the Browser Tab (pause / resume), not for playing variants on the timeline.
5. Logic Bar (Top Row)

5.1 MODE: Random vs Sequential
- Ran (Random) — each variant's parameters are truly random, independent of each other
- Seq (Sequential) — parameters walk linearly from min to max, producing a gradual change
Switching to Seq reveals a second switch:

Controls the sequence direction: from low to high, or from high to low.
Tip: Seq is very convenient for "gradually louder footsteps" or "a charge-up whose pitch keeps rising".
5.2 GLOBAL ENV: Global Envelope Switch

Controls whether take envelopes are drawn inside variants. When off, each variant's Vol/Pitch/Pan keeps a fixed random value across the variant length; when on, multi-point envelopes are drawn inside the variant, making values dynamically fluctuate over time.
The Env sub-sliders (point count) of the Vol / Pit / Pan strips require this master switch to be on to take effect. The FX Strip's Pts is an exception — FX envelopes are not controlled by GLOBAL ENV, only scaled by the AMT sub-slider (env macro).
5.3 Preset Button

Opens the preset panel; see section 10 for details.
5.4 Reset Button

Restores all parameters to defaults and clears the blue preview.
6. Strips (Six Horizontal Strips)
Each Strip has the same structure:
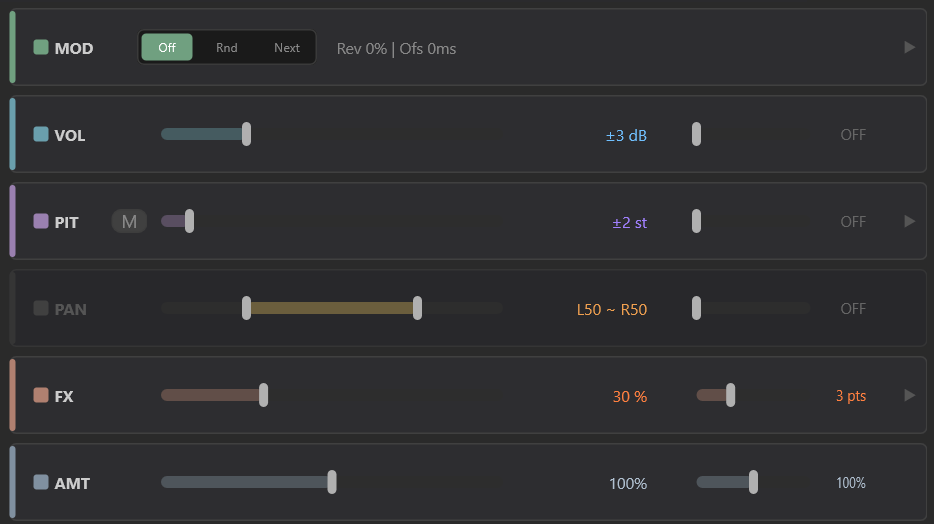
- Left dot indicator — click to enable / disable the strip; gray = disabled
- Main slider — random amount / intensity of that parameter
- Env sub-slider — envelope point count (how many rises and falls)
- ▶ expand arrow (if present) — expands to reveal more detailed settings
Tip: Slider modifier keys (apply to all parameter sliders, including Footer VARIANTS / SPACING):
- Shift + drag = fine adjustment, movement becomes finer for detailed tweaking
- Alt + drag (PAN dual-value slider only) = shift the whole range, both left and right handles move together, preserving the interval width
- Ctrl + left-click the numeric text (not the slider, the number text next to it) = the number becomes an input box in place, type a new number and press Enter to commit. Out-of-range values are automatically clamped to physical limits; Esc / clicking elsewhere cancels
- When the editor opens the whole text is selected; just type the new value to replace it
- PAN dual-value numbers accept
L50 ~ R50/C ~ R30/-0.5 ~ 0.5syntax; separate the two parts with~. If either part fails to parse the whole input is discarded- Entering
0for the env sub-number is equivalent to OFF

6.1 VOL: Volume Randomization

Main slider range 0~12 dB. A value of ±X dB means each variant's volume is randomized/sequenced between -X and +X dB.
Sub-slider: envelope point count (0~10). With GLOBAL ENV on, each variant's interior gets N volume envelope points for "dynamic loudness changes inside the variant".
6.2 PIT: Pitch Randomization

Main slider range 0~24 semitones. A value of ±X st means pitch varies between -X and +X semitones.
Expanded content ▶:
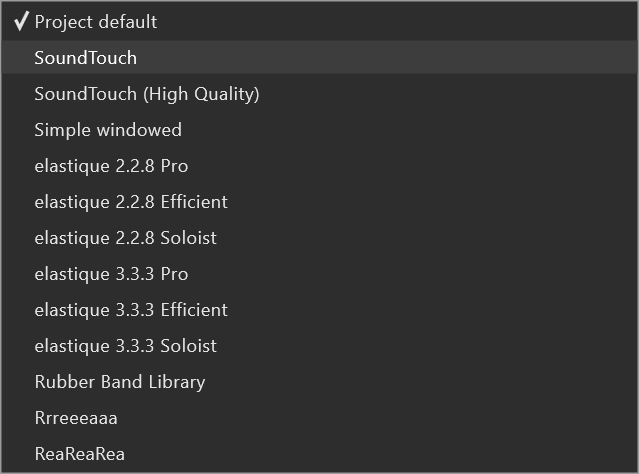
- Rnd: each variant uses a random algorithm (diverse quality when stretching)
- Custom: uses a fixed algorithm selected from the dropdown (Elastique Pro, etc.)
- Keep: keeps the algorithm originally set for each source item
- [M] button (STR/PIT toggle): when on, the strip title changes from
PITtoSTR— switches to Stretch mode: variant length changes (actually tempo change); the original "pitch shift without tempo change" becomes "tempo and pitch change together"
⚠️ In Stretch mode, the pitch envelope switches to a stretch envelope (stretch marker tempo envelope); the Env sub-slider then controls the number of stretch marker points.
⚠️ Switching [M] resets PIT intensity back to ±2; the value you set before switching is not retained.
6.3 PAN: Pan Randomization

The main slider is a dual-handle slider; you can set left and right boundaries separately:
L50 ~ R50means random within the left 50% to right 50% rangeC ~ R80means random from center to right 80%
Sub-slider: envelope point count, making pan wander back and forth inside the variant.
6.4 MOD: Reverse + Start Offset
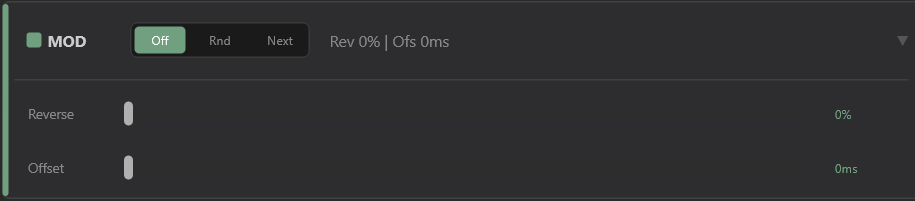
[ Off | Rnd | Next ] Rev 50% | Ofs 100msHead segment switch (Segment mode) — controls which segment of the source material the variant uses:
| Mode | Behavior |
|---|---|
| Off | Each variant uses the full segment of the source material (default) |
| Rnd | Each variant randomly picks one segment from automatically detected segments |
| Next | Each variant sequentially takes the next detected segment (good for long clips to "lay out chunks") |
Tip: Rnd / Next are great for "chopping and relaying" long Foley clips without manual cutting.
⚠️ Segments come from energy-based segmentation detection of the material (independent of the SPACING slider); Rnd / Next have no effect if the material does not detect at least 2 segments.
Expanded content ▶:
- Reverse slider (0~100%) — probability that each variant plays reversed. 100% = all reversed, 50% = half the variants reversed.
- Offset slider (0~1000 ms) — random start offset amount for each variant. For example, setting 200ms means each variant's start will randomly jitter within ±200ms, creating a "rhythmically loose" humanized effect.
Tip: The indicator dot for the whole MOD Strip controls whether Reverse is enabled; Offset is independent inside the expanded area.
6.5 FX: FX Parameter Randomization
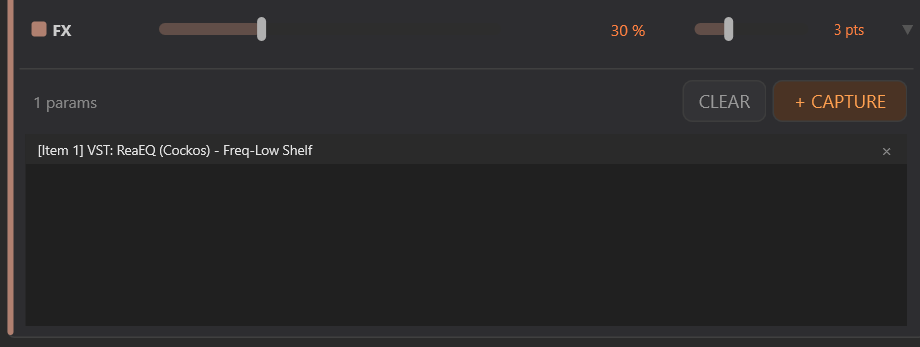
- Strip header (visible when collapsed) shows the Depth main slider + Pts sub-slider; the first line of the expanded area shows
N params— the number of FX parameters you have "captured" for Qi to control. - Pts slider — how many rise/fall points the FX envelope draws inside the variant
- Depth slider (0~100%) — swing amplitude of the FX envelope (percentage of the parameter's full travel)
- CLEAR button — clears all selected FX parameters
- + CAPTURE button — pressing enters "listen mode" (button becomes OK); at this point move any FX parameter in REAPER and Qi will automatically capture it into this list; press OK to exit listen mode. Note that Qi operates on items, so only FX parameters on items are supported; track FX parameters are not supported.
- × icon / double-click / Delete key — removes an FX parameter from the list
Tip: Workflow: select source items → add the FX you want to randomize → in Qi click CAPTURE → gently move the FX parameter in REAPER → Qi records it automatically → repeat → click OK to finish. After that, each variant will randomly swing on the captured FX parameters.
6.6 AMT (Amount): Global Amount Macro

The bottom strip. Both sliders are 0~200% global scalers:
| Slider | Effect |
|---|---|
| Main slider (left) | Scales the random amount of VOL / PIT / PAN / Offset / FX Depth together |
| Sub-slider (right) | Scales the envelope point count of VOL / PIT / PAN / FX together |
100% = as set; 0% = completely derandomized (all variants identical); 200% = double amount (clamped by each parameter's physical upper limit).
Click the indicator dot once = bypass: no parameters are scaled by AMT, they keep the values you set; the slider values are retained, and clicking again restores scaling.
Tip: Typical usage: set VOL / PIT / PAN / Offset to the "maximum effect" you want, then use the AMT main slider to control the overall amount of variation with one hand — seamlessly adjust from "very subtle" to "completely out of control".
7. Footer (Bottom)
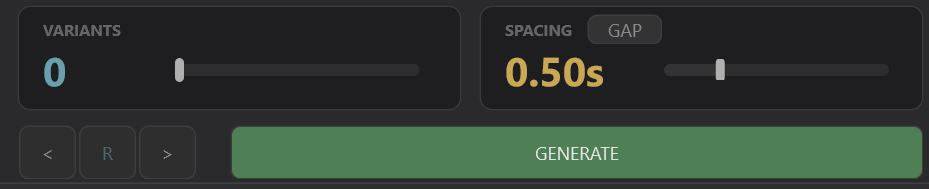
7.1 VARIANTS: How Many Variants
Slider 0~50, nonlinear segments:
| Segment | Slider travel | Use case |
|---|---|---|
| 0~3 | First 25% | Fine adjustment, a small curated set |
| 3~10 | 25%~50% | Daily workload |
| 10~20 | 50%~75% | Batch laying |
| 20~50 | 75%~100% | Mass output |
Low segments give fine control, high segments give coarse control — matching real-world usage.
7.2 SPACING: Variant Spacing
Controls the time distance between variants, in seconds.
Slider 0~10s, like VARIANTS, uses nonlinear segments — small spacings are the daily work area and get more travel for fine adjustment:
| Segment | Slider travel | Use case |
|---|---|---|
| 0~0.5s | First 25% | Very tight spacing, dense / overlapping laying |
| 0.5~2s | 25%~50% | Common daily spacings |
| 2~5s | 50%~75% | Stretched spacing |
| 5~10s | 75%~100% | Large spacing, coarse adjustment |
Low segments fine, high segments coarse — same idea as VARIANTS.
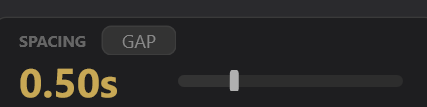
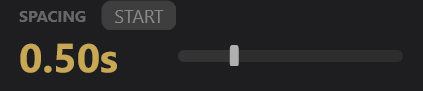
The START / GAP button switches between two meanings for spacing:
| Mode | Meaning |
|---|---|
| START | Interval between the start points of each variant (may overlap) |
| GAP | Interval from the end of one variant to the start of the next (never overlaps) |
Tip: Use START for dense laying (allows overlapping for a "stomping" feel); use GAP for orderly sequences.
7.3 Audition + GENERATE
<R>: previous / random / next variant (see section 4.3)- GENERATE button: commits the current blue preview as real items, then resets parameters to defaults
- Enter key: equivalent to GENERATE
⚠️ After Generate, all parameters and source item locks are cleared — this is by design: "after committing one round, start a new round".
8. Mask Tab: Per-Item Parameter Masking
Switch to the Mask Tab to see a table:
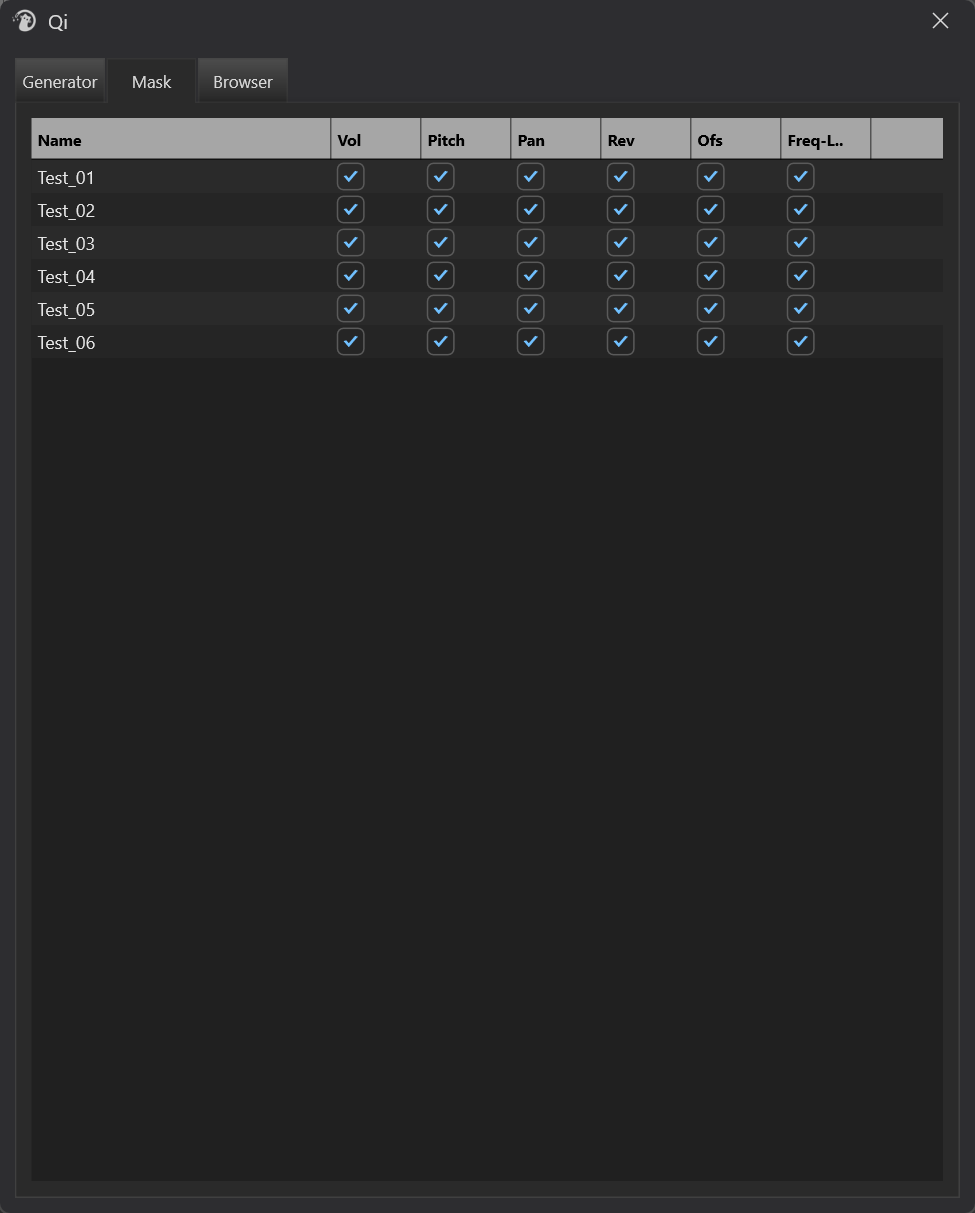
Each row corresponds to a source item; each column corresponds to a parameter: Vol / Pitch / Pan / Rev / Ofs (start offset), followed by columns for FX parameters you have captured. Unchecking = this item does not participate in that randomization.
Typical usage:
- Some items in a group already have a fixed pitch and you do not want Qi to randomize their Pitch → uncheck Pitch for those rows
- Some item sounds bad when reversed → uncheck Rev for that row
Tip: FX columns only appear after you CAPTURE FX parameters; column names are truncated to 6 characters; hover to see the full name.
9. Browser Tab: Media Library Browser
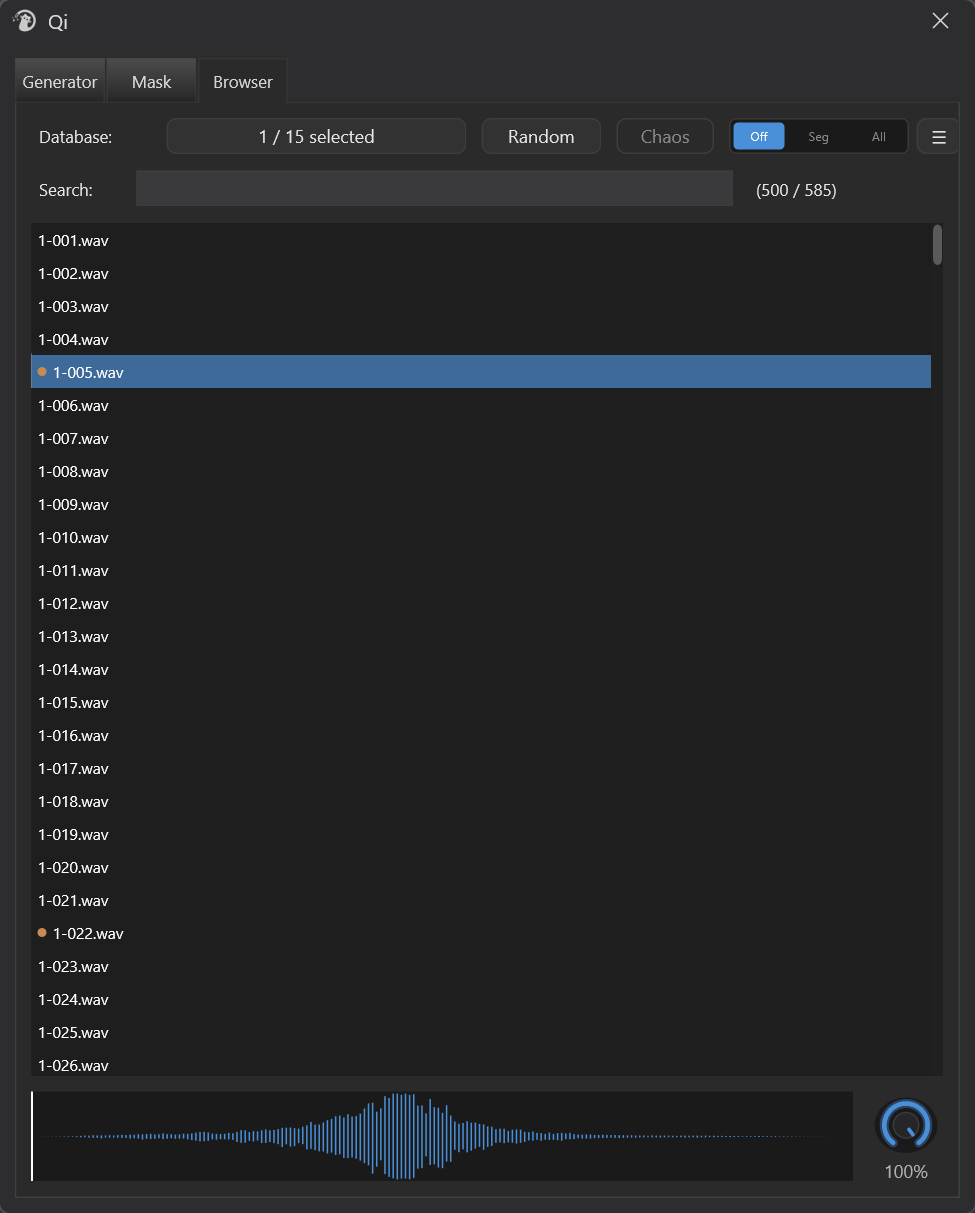
Switch to the Browser Tab to search and drag from your preconfigured media libraries.
9.1 Top Bar
| Control | Purpose |
|---|---|
| Database button | Choose which media libraries to enable (from REAPER's built-in Media Explorer database list). Also supports Soundminer databases — marked with [SM] prefix in the list |
| Random | Randomly pick one result for preview |
| Off / Seg / All | Whether to apply Segment slicing when dragging: Off = no slice; Seg = slice one segment; All = slice all segments |
| Chaos | Automatically apply Qi's current randomization parameters when dragging — what you drag out is already a variant |
| ☰ Settings | "Search on Enter" toggle (on by default; turn off for search-as-you-type), "Result limit" maximum result count (empty = unlimited) |
| Search | Keyword search, triggered by Enter (clearing the search box refreshes immediately). The counter on the right shows "loaded / total hits"; scrolling to the bottom of the list automatically loads the next batch |
9.2 File List
- Click: audition the file (waveform area starts playing)
- Drag: drag to a REAPER track and release; multiple files can be dragged
- Orange dot: marks that the file has already been auditioned or dragged in this session, avoiding repeated use
Multi-file drag arrangement — when dragging 2 or more files and releasing, an arrangement chooser pops up (matching REAPER's native "Insert Multiple Media Items" dialog), choose one of three:
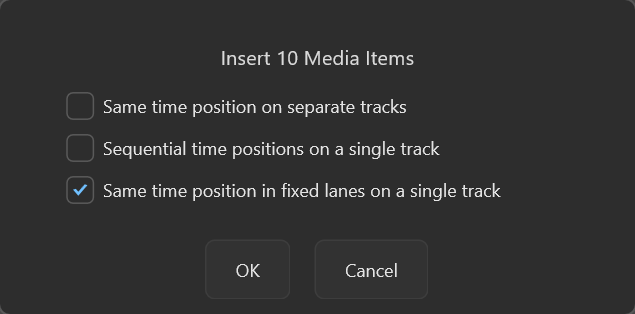
| Mode | Behavior |
|---|---|
| Same time position on separate tracks | Same time position, each file on its own track (new tracks are created automatically if needed) |
| Sequential time positions on a single track | All on the drop track, placed end-to-end in sequence |
| Same time position in fixed lanes on a single track | All on the drop track at the same time position, each file in its own fixed lane |
- The dialog defaults to your last choice (persistent, remembered even after restarting REAPER)
- Clicking Cancel aborts the drag; no files are inserted
- Seg / All / Chaos still apply when active; in All mode, multiple sliced segments are placed sequentially in Sequential mode and belong to the same lane in fixed-lanes mode
- Single-file drag does not pop up a dialog; behavior is unchanged
9.3 Waveform View
The small waveform strip at the bottom is for precise auditioning + dragging a selected clip:
| Action | Behavior |
|---|---|
| Left-click | Move playhead to this position |
| Right-click | Also moves playhead (works even when paused) |
| Left-click drag | Marquee-select a region (orange highlight + duration label) |
| Drag selection to REAPER | Insert just the selected segment onto the track (not the whole file) |
| Short click inside selection | Clear selection |
| Spacebar | Pause / resume audition |
There is also a preview volume knob (0~100%) on the right side of the waveform: double-click to reset to 100%, Ctrl + click to enter a value, Shift drag for fine adjustment.
Tip: Use this for "I only want the 0.5-second blast in this long clip" — marquee-select → drag to track → done.
10. Preset System
Click the Preset button in the top-right of the Logic Bar:
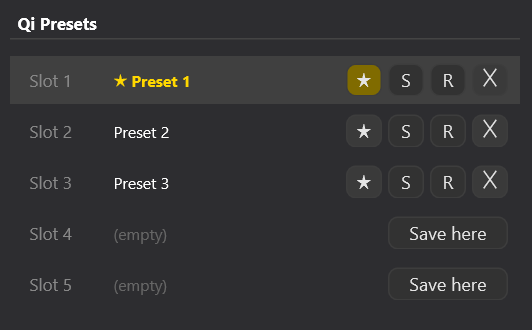
Five fixed slots. Each slot:
| Button | Behavior |
|---|---|
| Click row body (saved slot) | Load that preset |
| ★ | Set as default preset (gold = current default). Automatically loaded when opening the window; click again to unset default |
| S | Save current parameters to this slot (naming popup; existing slots are overwritten) |
| R | Rename |
| ✕ | Delete (with confirmation) |
Save here button (empty slot): save current parameters to this empty slot.
10.1 Purpose of the Default Preset
After setting a default preset, every time you open the Qi window that parameter set is loaded automatically — convenient when working on a sound type with relatively fixed settings.
10.2 Direct Action Application

These 5 Actions do not open Qi — select items, press shortcut → generate directly. Good for "I already know what this preset does and do not need to look at the window" scenarios.
11. Typical Workflows
Workflow A: 50 Never-Repeating Footsteps
1. Select a footstep item
2. Open Qi
3. Drag VOL to ±3 dB
4. Drag PIT to ±2 st
5. Click "Rnd" on the MOD head (random slice)
6. Expand MOD, drag Reverse to 10% (10% chance of reverse)
7. Drag VARIANTS to 50
8. Drag SPACING to 0.4s
9. Press < > R a few times until satisfied
10. Press GENERATE (or Enter)
Workflow B: Gradual Strum
1. Select a guitar strum item
2. Switch Logic Bar to Seq + Lo-Hi
3. Drag PIT to ±5 st
4. Drag VOL to ±2 dB
5. VARIANTS = 8
6. SPACING = 1.0s
   → 8 variants pitch from -5 semitones to +5 semitones linearly
7. GENERATE
Workflow C: Use FX Randomization for "Different Every Time" Filter Sweeps
1. Select a pad clip and add ReaEQ
2. Open Qi, expand the FX Strip
3. Click + CAPTURE
4. Gently move the Frequency knob on ReaEQ
   → Qi automatically captures "ReaEQ - Frequency"
5. Move Resonance too
   → Qi automatically captures "ReaEQ - Resonance"
6. Click OK to exit listen mode
7. Adjust FX Strip Pts = 5, Depth = 60%
   (FX envelope does not depend on GLOBAL ENV, no need to turn it on)
8. VARIANTS = 10 → GENERATE
   → 10 variants, each with a different filter sweep curve
Workflow D: Chop and Relay a Long Foley Clip
1. Select a 30-second long Foley clip
2. Switch MOD head to "Next" (sequential slice)
3. Switch SPACING to GAP mode, drag to 0.0s
4. VARIANTS = 20
   → 20 variants sequentially cut from the clip and laid on the timeline
5. Drag VOL to ±2 dB for slight variation
6. GENERATE
Workflow E: Use AMT Macro to One-Hand Adjust "Wildness"
1. Set VOL, PIT, PAN, and Offset to your desired "maximum effect"
   (e.g., VOL ±6dB, PIT ±4st, Offset 300ms)
2. Want "very subtle" — drag AMT main slider to 30%
3. Want "medium" — drag AMT to 60%
4. Want "completely out of control" — drag AMT to 150%
   → One slider controls the overall intensity of all parameters
Workflow F: Drag a Segment from the Media Library onto the Timeline
1. Switch to Browser Tab
2. Search "explosion"
3. Click one result to audition the waveform
4. Left-click drag on the waveform to select the blast segment you want
5. Hold the selection and drag it to a REAPER track
   → Only the selected segment is inserted, not the whole file
Workflow G: One-Key Generation with Preset Action
1. First use: tune a set of parameters and save to Preset Slot 1
2. In REAPER bind a shortcut to "Qi: Apply Preset 1" (e.g., Ctrl+1)
3. From then on:
   - Select an item
   - Press Ctrl+1
   → Window stays closed, variants are generated directly
12. Notes
12.1 Blue Preview Is Not the Final Result
Blue items = temporary preview. Only pressing GENERATE turns them into real items. Closing the Qi window or pressing Reset will make all blue items disappear.
12.2 All Parameters Are Cleared After Generate
This is by design — one commit = one round ends. If you want to keep parameters, save them as a Preset first.
12.3 Multiple Selected Items Are Copied "As a Group"
It does not create a separate variant for each item; instead it copies "the whole group" as a unit N times. Relative positions and lengths of items inside the group are preserved.
12.4 Stretch Mode Changes Variant Length
Turn on the [M] button on the Pitch Strip → strip title changes to STR → tempo and pitch change together (drag stretch markers), and variant length changes with the PIT random value. At this point the pitch envelope is replaced by a stretch marker tempo envelope (the Env sub-slider controls marker point count), and no take Pitch Envelope is created.
12.5 Add FX Before Capturing FX Parameters
CAPTURE listen mode can only capture FX currently on the selected items. If you move parameters in the air while listening, nothing is recorded.
12.6 AMT = 0% Makes Variants Almost Identical
Qi is not broken — 0% means "zero randomization"; Vol / Pitch / Pan / Offset / FX use base values. To restore randomness, drag the AMT main slider back to 100%.
Note that AMT does not scale Reverse probability or Segment slicing — when those are on, variants still differ in "reversed or not / which segment".
12.7 Mask Columns Are Also Affected by Global Strip Switches
If a strip's indicator dot is off, the corresponding column in the Mask table becomes disabled (gray and unclickable) — because the parameter itself is off, per-item masking has no meaning.
13. Troubleshooting
| Symptom | Possible cause | Solution |
|---|---|---|
| Items selected but no blue preview | VARIANTS = 0 | Drag VARIANTS to at least 1 |
| Blue preview not updating | Parameters not moved / Qi still debouncing | Wait 0.1s; or drag a slider to trigger update |
| GENERATE does nothing | No blue preview | Adjust parameters so blue preview appears |
| No audible difference | AMT main slider = 0% / all strips disabled | Check AMT and strip indicator dots |
| Audition buttons gray | No blue preview yet | Adjust parameters so preview appears |
| FX CAPTURE not working | Selected item has no FX, or you moved a different item's FX | Make sure you moved an FX parameter on the source item |
| No Pitch Envelope in Stretch mode | By design | Pitch envelope is replaced by stretch marker tempo envelope; Env sub-slider still works (controls marker point count) |
| Changed item selection but preview did not update | Source item set is locked while blue preview exists | Press Reset to end the round, then reselect |
| MOD switched to Rnd / Next but no reaction | Material does not detect at least 2 segments | Use a longer / more dynamic material |
| Browser keyword has no effect | Default is Enter-triggered search | Press Enter; or turn off "Search on Enter" in ☰ to search as you type |
| Preset Action says "Preset is empty" | That slot has not been saved yet | Save something in the window first |
| Preset Action says "Please select items first" | No item selected | Select at least one item before pressing the shortcut |
| Browser list is empty | No database enabled, or keyword too strict | Click Database button to check enabled items; clear Search |
| Variants not randomized after dragging files in | Chaos not checked | Check Chaos before dragging |
| Multiple variants overlap | SPACING is in START mode and value is too small | Switch to GAP mode, or increase SPACING |
| Blue items reappear after undo | Undo restored a generate operation | Qi will clean them automatically, but give it a moment |