
Loudness Meter
1. Overview
Loudness Meter is a lightweight loudness meter that lives on the Monitor FX chain. Its job is to let you glance at the current mix level.
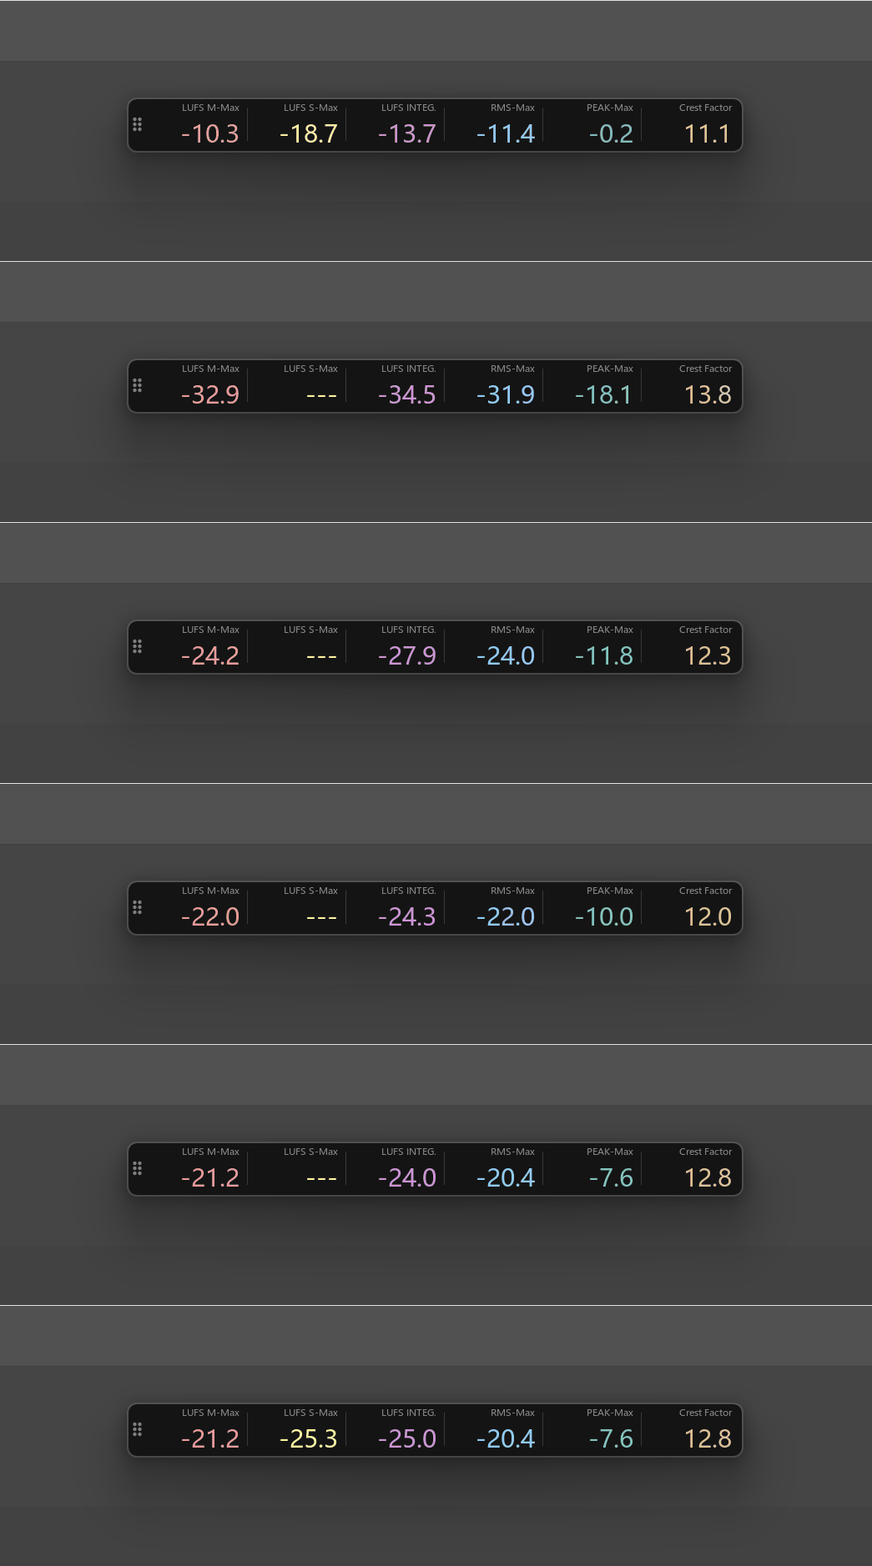
It shares the same Monitor FX CLAP plug-in with Sample Broker — so once either one has been opened, the other works immediately without a separate install.
The window is a narrow strip, small enough to park anywhere on screen and leave out permanently.
2. Opening the tool
Menu path:
Extensions → Mantrika Tools → Loudness → Lightweight meterOr use the Action List (search "Loudness"):
| Action name | Function |
|---|---|
mantrika : Loudness - Lightweight Meter | Toggle the Loudness Meter window on/off |
The first time you open it, if the shared CLAP is not yet in place the whole window becomes a single "Setup" button — click it to mount the plug-in automatically.
3. Interface overview

┌──┬─────────────────────────────────────────────────────────────────────┐
│::│ LUFS M-Max  LUFS S-Max  LUFS INTEG.  RMS-Max  PEAK-Max  Crest Factor│
│::│   -18.3      -16.2       -23.4       -22.1     -1.2       12.1      │
└──┴─────────────────────────────────────────────────────────────────────┘
 ↑   ↑          ↑                                  ↑
drag  module labels  green / yellow / purple / blue / cyan / sand-gold  turns red when > 0 dB
handle- The six dots on the left are the drag handle — hold to move the window; right-click for the menu.
- Values too low (≤ -70 dBFS) show
---. - Peak turns red immediately when it exceeds 0 dB, warning of clipping.
- One row of numbers, one row of small labels; colors distinguish the readings.
4. What the six readings mean
| Column | Meaning |
|---|---|
| LUFS M-Max | Momentary loudness peak (maximum over a 400 ms short window) |
| LUFS S-Max | Short-term loudness peak (maximum over a 3 s sliding window) |
| LUFS INTEG. | Integrated loudness (cumulative average per BS.1770) |
| RMS-Max | RMS peak (maximum short-window RMS) |
| PEAK-Max | Peak / sample-peak maximum |
| Crest Factor | PEAK-Max − RMS-Max, in dB (often abbreviated CF) |
About CF (Crest Factor)
CF = PEAK-Max − RMS-Max — in other words, how much the loudest transient in the current playback exceeds the loudest short-window RMS.
Intuitive guide (larger number = thinner waveform, smaller number = flatter waveform):
| Value | Typical material |
|---|---|
| 3 dB | Pure sine / triangle wave (theoretical minimum) |
| 6–9 dB | Brick-walled modern pop master |
| 10–14 dB | General mix / vocals / guitars |
| 15–20 dB | Real drums / percussion |
| 18–25+ dB | Clean transient SFX (whoosh heads, impacts) |
Why not "whole-clip average"? Earlier versions of CF used the full-clip average RMS as the denominator. For SFX with long fade-out tails, the tail dragged the average down, making CF grow endlessly and never settle on a usable reference value. Now CF locks to the loudest section; once the body has passed it stabilizes, and the number you see when playback stops is representative of the performance.
When mastering or making final loudness judgments, CF works alongside LUFS-I: LUFS-I tells you "how loud," and CF tells you "how squashed."
5. Automatic behavior
Readings accumulate per playback session, not forever:
| Trigger | Behavior |
|---|---|
| Stop → Play | All readings reset and start accumulating from this playback |
| Cursor jump during playback (> 0.1 s jump) | Same as above: reset and start from the new position |
| Playback stops | Readings freeze at the last moment, making it easy to read the full-pass statistics |
| Right-click the window | Manual reset (works while stopped too) |
The advantage is that every press of Play is a clean measurement, not polluted by the previous pass. If you want the loudness of a section, just play through it once.
6. Position / size memory
- Drag the handle to any position → the window returns there the next time it opens.
- Drag the window border to resize → the same size is restored next time.
- Position and size persist across projects and REAPER restarts.
That means you only need to find a comfortable spot once (corner of the screen, a strip on a secondary monitor, top of a second display, etc.), and then you can forget about it.
7. Right-click menu (on the drag handle)
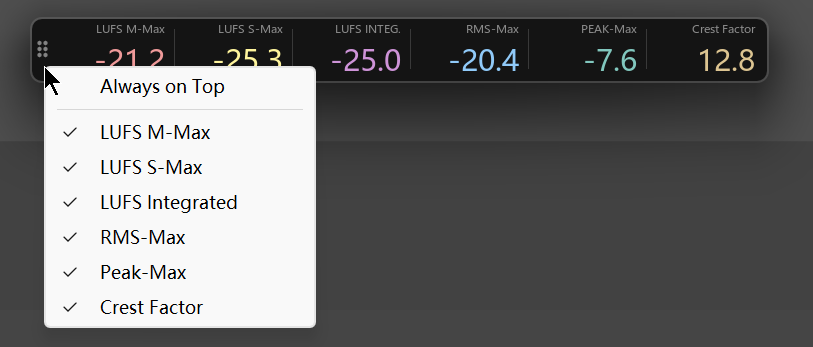
| Menu item | Meaning |
|---|---|
| Always on Top | Keep the window above REAPER so it is never hidden |
| LUFS M-Max ⋯ Crest Factor | Each reading can be shown or hidden individually |
Hiding readings also saves space; the remaining visible modules automatically share the remaining width — when only one is visible it fills the whole strip.
At least one module must remain visible; the last one is prevented from being unchecked.
All checkbox states in the right-click menu are saved and persist the next time the window opens.
8. Typical use
Use A: keep an eye on mix loudness
1. Open the window and drag it to a screen corner
2. Press Play
3. Glance at the LUFS-I column throughout the pass
Use B: judge the dynamics of the current material
1. Look at Crest Factor (let it play once and settle after the body passes)
2. < 8 dB → very flat (heavy compression / brick-walled master)
3. 10–14 dB → typical mix
4. > 15 dB → transient-driven (drums / SFX impacts)
Use C: check for clipping
1. Keep an eye on the PEAK-Max column
2. If the number turns red, it has exceeded 0 dB somewhere
3. Right-click to reset, then play again to locate the clip
9. Troubleshooting
| Symptom | Cause | Fix |
|---|---|---|
| Window shows only a "Setup" button | The shared CLAP is not installed / is bypassed | Click Setup and follow the prompt, or open Sample Broker once to run auto-setup |
Numbers always show --- | Not currently playing, or level is too low | Press Play; check input levels |
| Numbers stop changing | Project playback has stopped (readings freeze) | Expected behavior; they auto-reset on the next Play |
| PEAK-Max stays red | Clipping occurred during the accumulated pass | Right-click to reset, or play again to re-measure |
| Window position / size not remembered | (Should not happen) position and size are persisted | — |